Multi Asset Maintenance [U0230]
The Multi Asset Maintenance is an optional update (part of 2001 JULE Fund and Application Tracking modules). It allows changes to the location, use tax, property tax, UCC/title filing, and many more information to one, some, or all of the assets attached to a particular application/lease.
For application-side asset maintenance, the users will need to have the Application Tracking and 2001 JULE Fund modules and the authority to use the functionality. The user’s authority can be set up in the Application Tracking Setup [U0831]. To change the assets on an application which is not approved yet, use the Application menu option to run the update. Asset(s) can also be deleted using the application-side asset maintenance update.
For lease-side asset maintenance, the users will need to have the 2001 JULE Fund module. To change the assets that are already booked (on a lease), matured, or paidoff but not sold, use the lease-side Multi Asset Maintenance [U0230] update directly from the LeasePak Updates menu. Assets cannot be deleted using the lease-side asset maintenance update.
LeasePak prevents the users to update certain fields depending on the state or status of the asset. See the following table for details.
| Status of Asset | Application Asset | Asset in Inventory | Asset on Lease | |
| Applicable Update | Application | Application/Lease | Lease | |
| Field | Allow update RAQ | Allow update REQ | Allow update REQ | |
| 1 | Address | Y | Y | Y |
| 2 | Tax Area ID | Y | Y | Y |
| 3 | City | Y | Y | Y |
| 4 | County | Y | Y | Y |
| 5 | State | Y | Y | Y |
| 6 | Zip | Y | Y | Y |
| 7 | Use Tax Code | Y | Y | Y |
| 8 | Tax Type | Y | Y | Y |
| 9 | PPT Basis | Y | Y | Y |
| 10 | Report PPT(Y/N) | Y | Y | Y |
| 11 | Allow PPT(Y/N) | N | Y | Y |
| 12 | 8 UCC fields | Y | Y | Y |
| 13 | Book Accounting Method | Y | N | N |
| 14 | Book Depreciation Method | Y | N | Y |
| 15 | AMT Depreciation Method | Y | N | N |
| 16 | Fed. Depreciation | Y | N | N |
| 17 | State Depreciation | Y | N | N |
| 18 | In-Service Date | Y | N | N |
| 19 | Book Depreciation Date | Y | N | Y |
| 20 | Class | Y | Y | Y |
| 21 | Residual Amount | Y | Y | N |
| 22 | Acquisition Cost | Y | N | N |
| 23 | Identification | Y | Y | Y |
| 24 | Acquisition Date | Y | Y | Y |
| 25 | Supplier | Y | Y | Y |
| 26 | PPT Exempt Code | Y | Y | Y |
| 27 | Payment Amount | Y | Y | Y |
| 28 | Use Tax Exempt Code | Y | Y | Y |
From the LeasePak menu, select Updates, Maintenance, Multi Asset Maintenance. LeasePak displays the lease selection screen:

Type the lease number or click  to search, then click
Select to continue.
to search, then click
Select to continue.
On entering a paidoff or terminated lease number, the program will display a warning message. The warning message applies to the lease-side U0230 Multi Asset Maintenance update only.
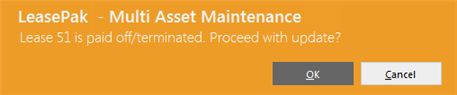
The user must click OK to proceed with the update.
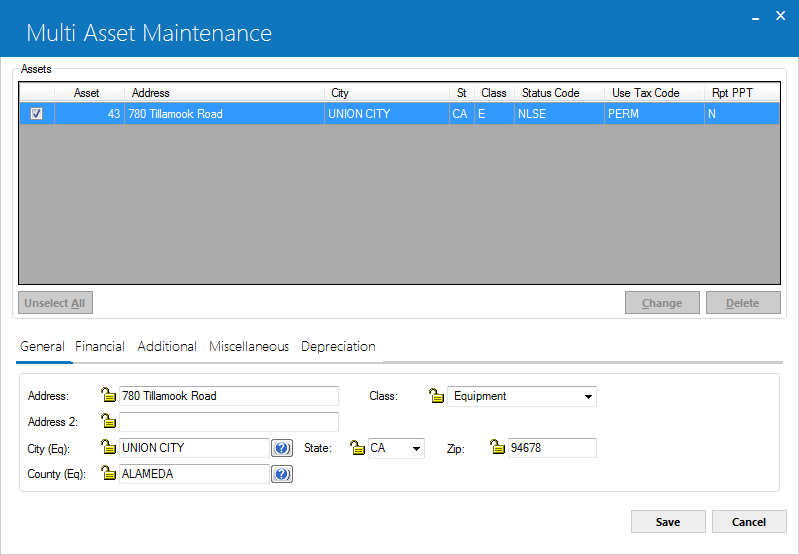
LeasePak displays the Multi Asset Maintenance screen. This screen is used for both application-side and lease-side asset maintenance with a few differences described below:

This screen has two main subsections.
The top half subsection (active by default) is called the Assets grid and lists all assets attached to the application/lease except those which are already sold. Sold assets are not displayed on this screen.
Click  in the leftmost column to select the corresponding asset record, click
  to cancel the selection, or use Select All/Unselect All toggle button to either select all assets records or clear all selections.
Click any column name in the Assets grid header row to sort the records on that column in ascending or descending order.
The user can also delete one or more assets on an application that is not approved yet using this subsection of the screen. For that, you will need to run this update from the Application menu. Select the assets you want to delete in the Assets grid and click Delete. The program will perform the delete operation in the following ways:
- For application/pending assets (those not yet booked into the inventory), the program will delete the assets, removing them from the LeasePak database.
- For assets already booked into the inventory, the program will detach them from the application, keeping them in inventory.
You cannot delete asset(s) that are already booked (on a lease), matured, or paidoff while running the Multi Asset Maintenance [U0230] update directly from the LeasePak Update menu.
The bottom half subsection (inactive by default) is used to view/change the asset fields based on the tab selected in the top half. Asset fields are arranged into five tabs given in the top half of the screen. Follow the document to learn more about the five tabs along with the asset fields arranged in them.
The update allows the user to change more than one asset at a time. Select the assets you want to change from the Assets grid and click Change. It will disable the Assets grid in the top half and enable the asset fields in the bottom half of the screen to view/change their values. By default, the asset fields arranged in the first tab (General 1) are displayed, however you can navigate through the other tabs to view/change the other fields as well.
The asset fields displayed in the bottom half of the screen can have two different states (locked or unlocked) and therefore can be updated in the following two ways:
Single Value Field - If the field have same value for all of the assets selected in the Assets grid, it is called single value field. Single value fields are active by default and displayed with an unlocked padlock  toggle button. You can directly enter a new value to a single value field or leave it blank.
Multiple Value Field - If the field does not have same value for all of the assets selected in the Assets grid, it is called multiple value field. Multiple value fields are inactive by default and displayed with a locked padlock  toggle button. To update a multiple value field, you need to click on the locked padlock toggle button to make it enable first. It will change the button into an unlocked position and make the field active. You can now enter a new value to an active field. If you do not want to make any change in the field value, simply click to change the unlocked padlock toggle button into a locked position. The program will consider the field unchanged on save.
You cannot set multiple assets' field value to blank, space (' '), or zero (0).
Moving the pointer over a locked padlock toggle button will display the following text as tool tip:
Multiple values currently exist. Click to change
After making the required changes to the asset fields, click Save. It will save the new values entered to the asset fields, except those with a locked padlock toggle button, to all of the asset records selected in the top half of the screen.
If you leave a field blank with an unlocked padlock toggle button and save it, the program will change the data in that field for selected asset records to blank only if the blanks are allowed for the field.
If you enter zero value in a numeric field with an unlocked padlock toggle button and save it, the program will change the data in that field for selected asset records to zero.
 Changes made to the asset fields will affect all assets selected (checked) in the Assets grid.
The program will enforce all edit checks for valid values in any asset field being updated, as currently represented in the U0210 Asset and U0120 Change Asset updates.
Clicking Cancel will prompt the following message.
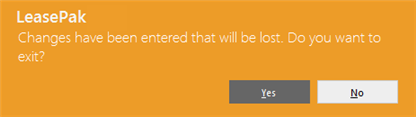
Click No in the message box to go back to the main U0230 Multi Asset Maintenance screen where you can save the changes to the asset records permanently. Or click Yes in the message box to discard the changes and return to the prior screen where a new lease number may be entered.
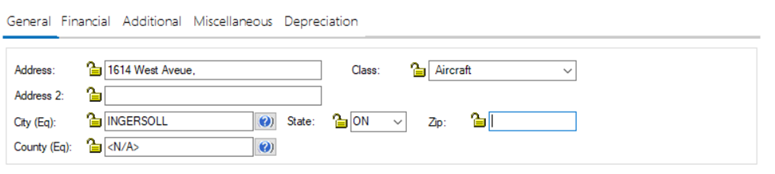
Tab 1: General
Field Description
- Address
- Type the street address corresponding to the location of the asset(s) or leave blank to retain the current address.
- Address 2
- Type the street address 2 corresponding to the location of the asset(s) or leave blank to retain the current address.
- Tax Area ID
- Click on search button
 to enter address and a valid tax area ID. For TAID users must purchase Vertex O module and select a vertex O asset.
 - City
- Type the city corresponding to the location of the asset(s), click to use Location Search, or leave blank to retain the
current city. Typing information in this field will require updates to the County, State, and Zip fields as well.
Running Location Search without first specifying any criteria (such as a state or province) accesses all location records (50,000+ if Vertex locations are loaded) in the LeasePak database and can take up to 15 minutes to complete.
- County
- Type the county corresponding to the location of the asset(s), click to use Location Search, or leave blank to retain the
current county. Typing information in this field will require updates to the City, State, and Zip fields as well.
- State
- Type the state corresponding to the location of the asset(s), click
 to select from the list, or leave blank to retain the
current state. Typing information in this field will require updates to the City, County, and Zip fields as well.
to select from the list, or leave blank to retain the
current state. Typing information in this field will require updates to the City, County, and Zip fields as well. - Zip
- Type the postal/zip code, or leave blank to retain the current code, up to 9 characters maximum length. LeasePak expects specific postal code formats for the US, Canada, and several other countries. Refer to Postal Code Formats (opens in a new window) for more information on specified formats. Typing information in this field will require updates to the City, County, and State fields as well.
- Class
- Type the class corresponding to the location of the asset(s), click to select from the list, or leave blank to retain the
current state. Class codes fall into 2 categories: equipment and vehicles. Equipment classes are listed first. Heavy vehicles such as buses and trucks are included in the equipment class. Midway through the list of valid codes the class "vehicle" appears, and all the codes after it fall into vehicle classes.
 For Vertex O users only: The search button will only appear if asset is a Vertex-O asset. Users can still enter the address directly by the non-Vertex method. If fields are disabled click on the Class lock button to unlock and enter address information.
Tab 2: Financial

Field Description
- Acquisition Cost
- Enter the original acquisition cost of the pending asset. The field is mandatory. This amount is established as the accounts payable for the asset. If assets are to be associated with an application having a trade-in, the total acquisition cost of all the assets should be net of the trade-in value.
If the Multiple Banks module is purchased and the asset is an insurance asset, LeasePak will use the Acquisition Cost to hold the insurance premium.
- Residual Amount
- Enter the residual amount (total estimated market value of the asset at the end of the lease). This field is defaulted if RESIDUAL % was coded on Application Tab 4. The default value is determined using the following formula:
ACQUIS COST * (RESIDUAL % / 100)
LeasePak allows operating type assets to be booked with a RESIDUAL that exceeds the ACQUISTION COST. For interest bearing loans, the residual field can be used to book a balloon payment.
With the Asset Cost Recalculation switch, Custom General [U0712] - Miscellaneous Customizations, enabled, LeasePak automatically adjusts the residual amount when acquisition cost changes.
- Payment Amount
- Enter the asset's monthly rental payment amount. LeasePak uses this when calculating the asset yield.
 For Asset Focused leases, LeasePak uses this payment amount to create the payment schedule for the asset's application. The payment amount in the schedule is based on the ratio of each asset's payment amount to the payment amount of the first stream in the application's payment schedule.
LeasePak allows the user to change the asset payment amount in Rebook [U0116] and the percent of schedule used in the tax calculations after the lease has booked.
If you are using the Customer Service module, the asset payment amount will affect what the Lease Summary screen [F5] displays for the asset payment schedule. Refer to the Asset Tab of Customer Service [U1601]: Lease Summary for more information (the asset payment schedule does not appear on any reports and is not stored in LeasePak data).
Tab 3: Additional
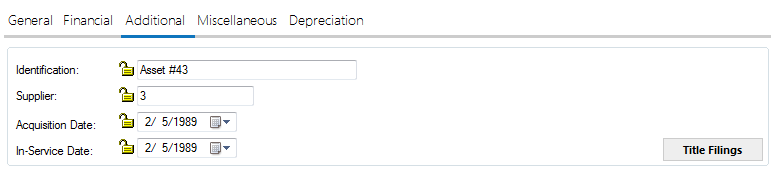
Field Description
- Identification
- Enter the asset identification (e.g., the serial number of the asset). The IDENTIFICATION need not be unique throughout the system.
- Supplier
- Click to perform a Client Search for the Vendor number of the supplier of the asset. If the vendor does not yet exist on LeasePak, it may be added through the Vendor update [U0201]. If complete information on the supplier is not yet available, this field may be left blank and whatever partial name and address is known may be recorded in the following fields.
- Acquisition Date
- Enter the date, in MM/DD/YY or DD/MM/YY format, depending on the Date Format Preference field in Security [U0706], the asset was acquired by the lessor. This field is required. It may be a future, estimated date.
If the Multiple Banks module is purchased and the asset is an insurance asset, LeasePak will use the Acquisition Date as the insurance effective date, the other Charge, Residual and Salvage Value will be set to 00.00 and cannot be changed. - In-Service Date
- Enter the date, in MM/DD/YY or DD/MM/YY format, depending on the Date Format Preference field in Security [U0706], on which the asset was placed in service. The IN-SERVICE DATE is the starting date for all depreciation except book depreciation and manufacturer's depreciation. It need not correspond to the asset acquisition date, lease date nor the lease commencement date. This field is required. It may be a future, estimated date.
When a new or cloned asset is being booked and the in-service date crosses a previous tax year boundary, LeasePak will display a warning message to notify the user, this message is informational only: "Warning-Asset In-Service date is prior to a previous tax year. Continue Y/N?"
When Y is selected, the user may continue to add the asset. When N is selected, LeasePak will cancel the add asset update and return to the first screen. - Title Filings
- Select the assets to operate on from the Assets grid and click Title Filings. The program displays a popup Title Filings update window:
-
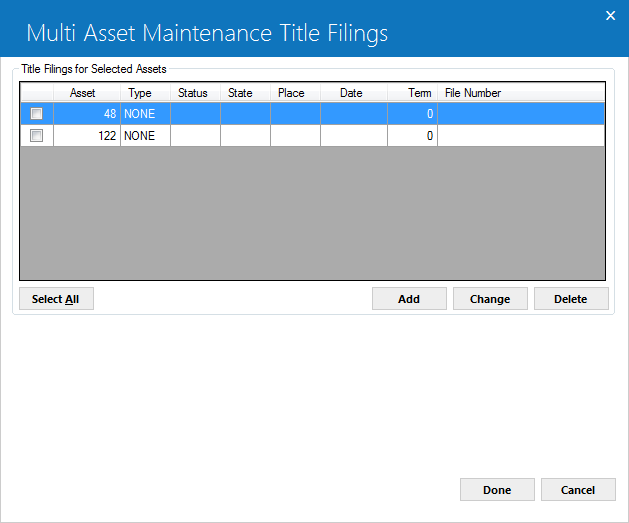
While the Title Filings popup window is opened, you will not be able to access the main U0230 Multi Asset Maintenance screen. The window lists all title filings on record for the assets selected on the main U0230 Multi Asset Maintenance screen. Each asset can have up to five title filings. You can select one or more title filing records on this window and change or delete them. You can also create new title filing records for each of the assets selected on the previous screen, up to the maximum of five title filings per asset. The following describes various functions of the Title Filings update:
Select All – Use Select All/Unselect All toggle button to either select all title filing records in the top half of this window or clear all selections.
Delete – Use Delete button to remove all title filing records selected in the top half of this window. The program will permanently delete the records from the LeasePak database once the Save button is clicked on the main U0230 Multi Asset Maintenance screen.
Change – Select the title filing records in the top half of this window and click Change. The program will make the Title Filings Changes section available for changes in the bottom half of this window as follows.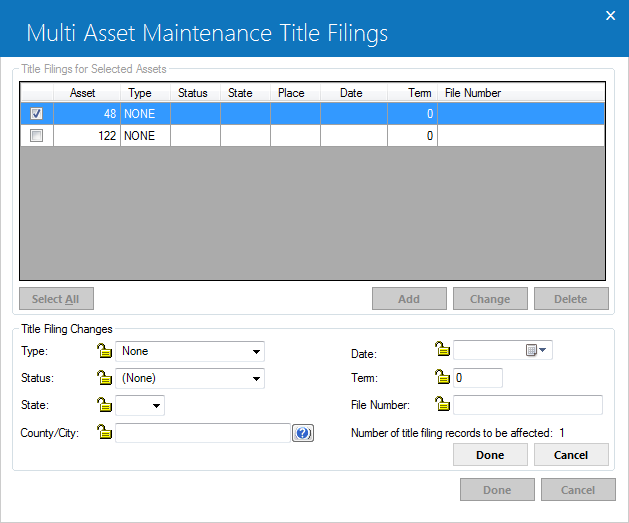
Similar to the asset fields, the title filing fields can also have single or multiple values for the selected assets. So to update the title filing fields, you need to use the same technique that is discussed for Multi Asset Maintenance above.
After making the desired changes to the title filing fields, click Done button within the Title Filing Changes section of the window. It will apply the new values entered to the fields, except those with a locked padlock toggle button, to all of the title filing records selected in the top half of the window.
Now click Done in the bottom half to close the Title Filings update window. The program will update the LeasePak database with the changes once you click the save button on the main U0230 Multi Asset Maintenance screen.
Add – This button helps you to add a new title filing record to the selected assets. Similar to the function of Change button, when you click Add button, it will make the Title Filing Changes section available with empty fields in the bottom half as follows: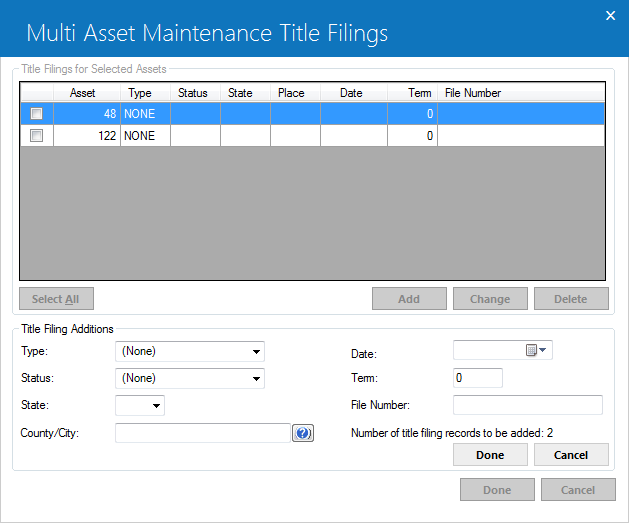
All fields are mandatory except File Number in this screen.
NOTE: There is a read only field "Number of title filing records to be added:" which tells how many title filing records will be added in one attempt. The field is informational only.
Fill up the required fields in the Title Filing Changes section in the bottom half (unless Type is NONE, in which case only Type is required) and click Done. The program will use the entered information to create a new title filing record for each of the asset selected on the main U0230 Multi Asset Maintenance screen, up to a maximum of five title filing records per asset.
- TITLE FILING - TYPE
Click and select the type of filing for the asset. Up to 5 lines of title filings for each asset may be stored.
If a code other than 'NONE' is entered, the filing status, the state of filing, filing date and term must be entered.
- TITLE FILING - STATUS
Click and select the filing status for the title filing entered under TYPE.
- TITLE FILING - STATE
Enter the 2-character code for the state of filing. Click for a list of valid state abbreviations.
- TITLE FILING - COUNTY/CITY
The combination of state and county, or state and city must have been entered through Location update [U0701]. Use the Location Search (...) to enter the state and view a list of valid city and county abbreviations.
- TITLE FILING - DATE
Enter the date of filing in MM/DD/YY or DD/MM/YY format, depending on the Date Format Preference field in Security [U0706].
- TITLE FILING - TERM
Enter the filing term in months. The expiration date of the filing is defined as the filing date plus the filing term. When the filing has expired, the lease automatically appears on the Certificate of Ownership report [R0903] and in the Collateral Tracking module, a separately purchased module of LeasePak. Only booked assets will appear on the reports and in Collateral tracking.
- TITLE FILING - FILE NUMBER
Enter the number on the title certificate. If a certificate has not yet been received, enter "unknown" or "pending."
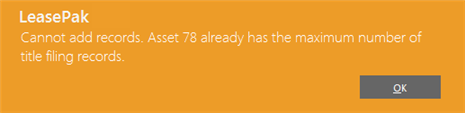
If you will attempt to add a title filing record to an asset that already has five records in its title filing list, the program will prevent you from adding a new record with the following error message:
Click Cancel in the Title Filing Changes section. It will ignore any changes made in the section, activate the Title Filings for Selected Assets section in the top along with its Done and Cancel buttons, and hide the Title Filing Changes section.
Once you are out of the Title Filing Changes, click Done to close the Title Filings update window. It will take you to the main U0230 Multi Asset Maintenance window where you can permanently save all changes made to the title filing records to the LeasePak database.
If there are changes to save in the Title Filing update window and you clicks Cancel, the following message displays: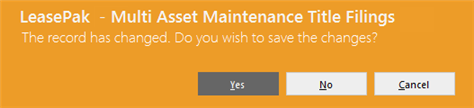
Click No in the message box to discard the changes made to the title filing records and return to the main U0230 Multi Asset Maintenance screen. Or click Yes to carry all the changes to the main U0230 Multi Asset Maintenece screen where you can permanently save all changes made to the title filing records to LeasePak database.
- TITLE FILING - TYPE
Tab 4: Miscellaneous
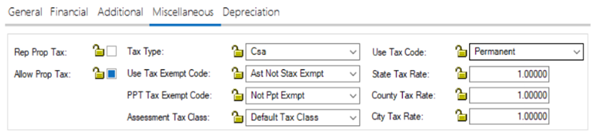
Field Description
- Rep Prop Tax
- Check the box if the asset, once it is booked, should appear on the following reports:
-
- Taxable Income [R0301]
- Investment Tax Credit Listing [R0303]
- Investment Tax Credit Review [R0303]
- Tax Depreciation [R0304]
- Energy Tax Credit Review [R0308]
- Tax Timing Differences [R0310]
- Gross Profit Deferral [U0608]
- Allow Prop Tax
- Check the box if the asset, once it is booked, should appear on the Property Tax Assessment report [R0305]. Only booked assets will appear on reports.
You can check or clear this field for any selected group of assets in the Assets grid, but during processing, changes will only apply to the assets attached to the application that are already in inventory. - Tax Type
- Type the TAX TYPE code or click to select from the list. This code indicates a type of tax reporting for the asset. If the TAX RPTG switch is not checked, this field is informational only. Available Tax Types are:
- Csa (conditional sales agreement) -- usually finance leases; LeasePak reports all payments accrued as gross receipts
- True lease (accrual) -- finance or operating leases; LeasePak reports all payments accrued as gross receipts
- True lease (cash) -- finance or operating leases; LeasePak reports only payments actually received as gross receipts
- Use Tax Code
- Type the USE TAX CODE or click to select from the list. It indicates which taxing entities are in effect for the asset, based on the asset's city and state location. The following is a list of the valid Use Tax Codes:
-
- State, County, and City -- asset(s) subject to tax (if any) in all three jurisdictions
- City -- asset(s) subject to tax (if any) in city jurisdiction only
- County and City -- asset(s) subject to tax (if any) in county and city jurisdictions only
- County -- asset(s) subject to tax (if any) in county jurisdiction only
- State -- asset(s) subject to tax (if any) in state jurisdiction only
- State and City -- asset(s) subject to tax (if any) in state and city jurisdictions only
- State and County -- asset(s) subject to tax (if any) in state and county jurisdictions only
- Exempt Use and Sale -- lessee is legally exempt from paying sales or use tax in all jurisdictions; LeasePak disallows assessment of sales/use tax on asset(s) but still reports asset on the regular Use Tax Disbursal listings
- Exempt and Non-Reporting -- lessee is legally exempt from paying sales or use tax in all jurisdictions; LeasePak disallows assessment of sales/use tax on asset(s) and reports tax release information on the Use Tax Disbursal Non-Reportable listings
- Tax paid Up Front -- lessee paid sales tax for the asset(s) at the beginning of the lease; LeasePak allows assessment of sales/use tax on other assessments only (not on the rental stream) and does not allow assessment at payoff
- Exempt Use Tax Only -- lessee paid sales tax for the asset(s) at the beginning of the lease; LeasePak allows assessment of sales/use tax on other assessments only (not on the rental stream), but does allow additional sales tax assessment at payoff
- Permanent -- asset(s) subject to the tax rates in effect on the commencement date of the lease and these rates remain in effect throughout the life of the lease, regardless of jurisdictional changes (if a new lease is booked with a commencement date earlier than the book date--that is, backdated--and a tax rate change occurred between the commencement date and book date, taxes charged will reflect that change as of its effective date)
- 1) If the rate lock is unlocked, the update will save the value from the screen.
- 2) If the rate lock is not unlocked, then check if the use tax code was PERM or not
- 2a) If the code was PERM, then don’t update the rate
- 2b) If the code was not PERM, then update the rate to the RLO rate
- PMST -- Permanent State.
The following rules will apply only for PERM type of use tax code:
When user has selected all assets then the tax rates can only be displayed and changed if all selected assets have the same location, then use tax code is PERM for all selected assets, all tax rates are the same, and Allow Permanent Tax Rate Change for PERM Use Tax Code is selected from U0212 Miscellaneous Customization.
The use tax code on all selected assets can be changed to PERM. This will only apply if all the selected asset(s) have the same use tax code. The tax rates can be changed only if the location and tax rates are the same for all the selected assets and the Allow Permanent Tax Rate Change for PERM Use Tax Code is selected in U0212 Portfolio – Miscellaneous Customization.
On saving, the system will override the current rates stored in city/state/county tax rates with the tax rates that have been updated. Use unlock/lock to update the tax rates. No values will be displayed if the rates are not the same for all assets. Users can unlock the field and update the rates. If the use tax code is a mixture of PERM and any other codes or none are PERM; however, this does not matter for update purposes. The rates fields will be grayed out because they cannot be changed. Any asset that did not have a use tax code of PERM should assume the rates on the asset are the rates from RLO table. Any asset that had the use tax code of PERM previously, will use the stored rates when determining if they are the same and will compare rates across all assets (either the currently stored PERM rates from the asset or the RLO rates if the asset was not PERM) then display the rate only if it is the same for all assets.
On saving the update
U0230 Multi Asset Maintenance update does not support asset(s) based on Canadian province (state) with Vehicle Tax Table when Use Tax Code is other than Upfront Sales Tax type.
For Vertex O users only: The supported Use Tax Codes for Vertex O assets are ALL, NOEX, NONR, NOPF, NOUT, and NOAP. Changing the asset from one use tax code to other cannot be done on this screen. For assets with NOPF or NOUT codes, LeasePak will override the Vertex-O rules and mark them as exempt with the reason code, and will not charge additional upfront sales tax amounts.- Use Tax Exempt Code
- Informational only. Provides additional information on why the asset is exempt from Sales/Use Tax (if applicable). Type the code or click to select from the list. Type or select NONE to bypass. Other possible default values are:
- EAUP -- Sales/Use Tax paid up front on purchase price
- EAUG -- Sales/Use Tax paid up front on gross receipts
- EALO -- Asset is attached to a loan
- EA3P -- Third party is responsible for Sales/Use Tax
You can add additional values using the Custom Code [U0722] update, code category STX.EX.AST.
- PPT Tax Exempt Code
- Informational only. Provides additional information on why the asset is exempt from Personal Property Tax (if applicable). Type the code or click to select from the list. Type or select NONE to bypass. Other possible default values are:
- NOLR -- NOT EXEMPT LES PAY
- NABT -- NOT EXEMPT ABATE
- N3PT -- NOT EXEMPT 3RD PARTY
- NINV -- NOT EXEMPT INVENTORY
- NREP -- NOT EXEMPT REPO/INV
- ELES -- EXEMPT LES PAY
- EL3P -- EXEMPT LES 3RD PTY
- ELAB -- EXEMPT LES ABATE
- EXPT -- EXEMPT FROM PPT
- EXLO -- EXEMPT LOAN
- EXLP -- EXEMPT LEASE/PURCH
- EXLV -- EXEMPT LEV LEASE
- EXSL -- EXEMPT SOLD
- EXMV -- EXEMPT MOVED
You can add additional values using the Custom Code [U0722] update, code category PPT.EXEMPT. - Assessment Tax Class
-
Select required assessment tax class from drop down. This field allows a user to define the taxability of assessments for an asset. These assessment tax class codes are the codes created via U0725 Sales Tax on assessments. A default code NONE will be displayed for selected asset(s) that is intended/required to change if LeasePak determines that the assessment tax class field is blank. Select one of the valid assessment tax class code stored in rcc Custom Codes table. These available codes in the drop down are the codes created in U0725 Sales Tax on Assessment.
- NONE -- DEFAULT TAX CLASS
You can add additional values using the Custom Code [U0725]. Add assessment tax class, select state, and define the assessment tax class description. - Use Tax Code
- Select use tax code for an asset from dropdown. This field will be populated if user has selected the use tax code while creating an asset.
- State/City/County Tax Rate
- Enter or change the State/City/County tax rates for selected asset. If Use Tax Code is other than PERM than the rates cannot be changed. If use Tax Code is PERM than the tax rates can ony be change if Allow Permanent Tax Rate Change is checked from U0212 Portfolio Miscellaneous Customizations option.
Tab 5: Depreciation
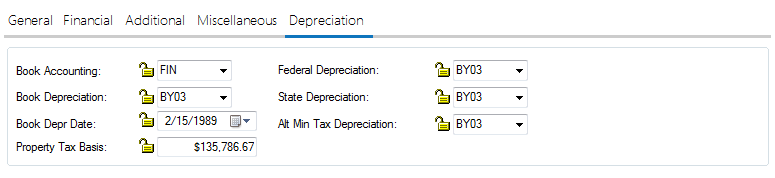
Field Description
- Book Accounting
- Click to select one of the following:
FIN (FINANCE): Enter this method if the asset is to be booked on a lease other than an operating lease. Monthly book depreciation is recorded at the asset level, but no General Ledger updating is performed.
OPER (OPERATING): Monthly book depreciation is recorded at the asset level. In the General Ledger, the inventoried value of the asset is decreased and the depreciation expense is increased by the depreciation amount.
If the Multiple Banks module is purchased and the asset is an insurance asset, LeasePak will automatically default the accounting method to Finance.
- Book Depreciation
- Click to select a book depreciation codes as established by the LeasePak system. The third and fourth characters in the code indicate the asset's depreciable life in years for book depreciation.
The guidelines for various federal depreciation methods discussed above also apply to book depreciation (e.g., ACRS depreciation may not be used for assets with an IN-SERVICE DATE prior to January 1, 1981). DVA1 and/or DVA2 depreciations are to be used when calculating the Diminishing Value of the asset.
With the Asset Cost Recalculation switch, Custom General [U0712] - Miscellaneous Customizations, enabled, LeasePak automatically adjusts this value when acquisition cost changes.LeasePak prorates book depreciation based on various criteria. See U0443 Depreciation for details on which criteria affect this process.
- Book Depr Date
- Enter the starting date for book depreciation of the asset in MM/DD/YY or DD/ MM/YY format, depending on the Date Format Preference field in Security [U0706].
- Property Tax Basis
- This field will default the total Acquisition Cost of the asset as set in Tab 1. The user may change the Property Tax Basis for tax purposes. Property Tax Basis may also be modified throughout the life of the lease by using PROP TAX BASIS field in the Asset [U0210] update. This field is informational only and is part of the JULE Fund 1996 module.
With the Asset Cost Recalculation switch, Custom General [U0712] - Miscellaneous Customizations, enabled, LeasePak automatically adjusts this value when acquisition cost changes.
- Federal Depreciation
- Federal depreciation codes are established by the LeasePak system. Click and select the appropriate code. The third and fourth characters in the code indicate the asset's depreciable life in years for federal deprecation.
ACRS depreciation may not be used for assets with an IN-SERVICE DATE prior to January 1, 1981.
ACRS Safe Harbor depreciation may not be used for assets with an IN-SERVICE DATE after December 31, 1983.
MACRS 1/2 Year Convention and MACRS Mid Quarter Convention depreciation methods may not be used for assets with an IN-SERVICE DATE before August 1, 1986.
ADR depreciation may not be used for assets with an IN-SERVICE DATE after December 31, 1980.
If federal depreciation is not to be calculated for the asset and Investment Tax Credit is to be claimed, the bypass depreciation methods must be used. The bypass depreciation methods must be used if the asset is tied to an Interest Bearing Loan DVA1 and/or DVA2 depreciations are to be used when calculating the Diminishing Value of the asset.
- State Depreciation
- Click and select the state depreciation method for the asset. State depreciation codes are established by the LeasePak system. The third and fourth characters in the method indicate the asset's depreciable life for state depreciation.
The guidelines for various federal depreciation methods above also apply to state depreciation (e.g., ACRS depreciation may not be used for assets with an IN-SERVICE DATE prior to January 1, 1981).
- Alt Min Tax Depreciation
- Click and select the alternative minimum tax (AMT) depreciation method for the asset. Alternative minimum tax depreciation codes are established by the LeasePak system. The third and fourth characters in the method indicate the depreciable life of the asset for AMT depreciation.
AMT depreciation may not be used for assets with an IN-SERVICE DATE prior to August 1, 1986.
The bypass depreciation methods must be used if the asset is tied to an Interest Bearing Loan.
Reports
Validation Report
After making the required changes to the selected assets, when you will click Save in the Multi Asset Maintenence screen, the program will start validating all intended field changes. If all changes are valid, it will produce a validation report that you can check before committing the transaction.
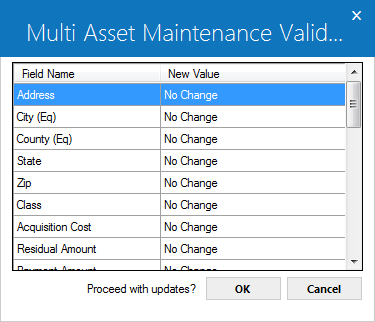
You can review the fields the program will update in the report and click OK to proceed or Cancel to return to the update window.
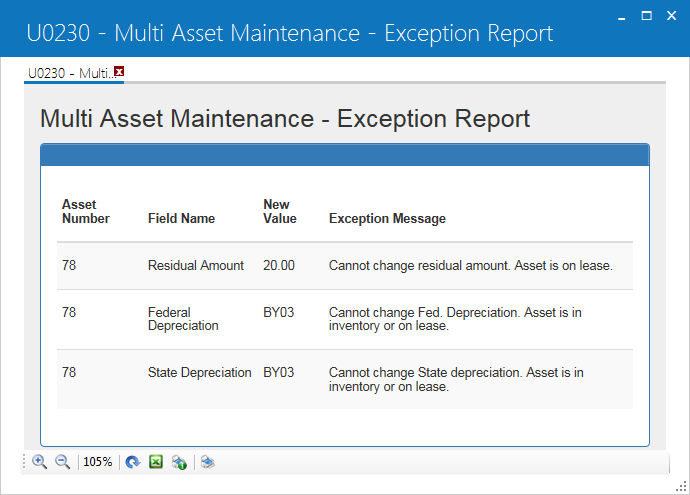
Exception Report
If the program is unable to validate any field change on any of the assets selected, it will instead produce an exceptions report. It's a standard XML-format report with filename "lpu0230_exceptions.rpt" that you can:
- Leave open while working in the update to correct exceptions
- Print out or export to Microsoft Excel
- View or print later using R0929 Print/View User Reports
The report will list each failed asset/field update attempted and why it failed, displaying the following columns:
- Asset Number
- Field Name
- New Value
- Exception Message
Audit Report
Once all intended field changes are validated succesfully, the program will produce a audit report. It's a standard XML-format report with filename "lpu0230_audit.rpt" that you can:
- Leave open while working in the update to correct exceptions
- Print out or export to Microsoft Excel
- View or print later using R0929 Print/View User Reports
The report will list all asset/field changes, displaying the following columns:
- Asset Number
- Field Name
- Old Value
- New Value

LeasePak Documentation Suite
©
by NetSol Technologies Inc. All rights reserved.
The information contained in this document is the property of NetSol Technologies Inc. Use of the information contained herein is restricted. Conditions of use are subject to change without notice. NetSol Technologies Inc. assumes no liability for any inaccuracy that may appear in this document; the contents of this document do not constitute a promise or warranty. The software described in this document is furnished under license and may be used or copied only in accordance with the terms of said license. Unauthorized use, alteration, or reproduction of this document without the written consent of NetSol Technologies Inc. is prohibited.