U02 Maintenance
U0241 Credit Bureau Bankruptcy
Allows the user to modify credit bureau reporting-related bankruptcy values for leases associated with the selected client.
 Requires Credit Bureau Extract module. Contact your NETSOL representative for more information.
Selection Criteria
Introductory Notes
Select the client to modify:
Screen and Fields
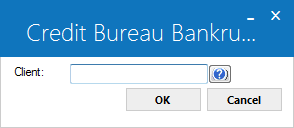
 Client ID
- Required
-
Enter the client number or click
 to search, then click Select.
 Database equivalent: rcx.client_id_s
Leases
Introductory Notes
Grid of leases associated with the selected client that are available for modification:
Screen and Fields
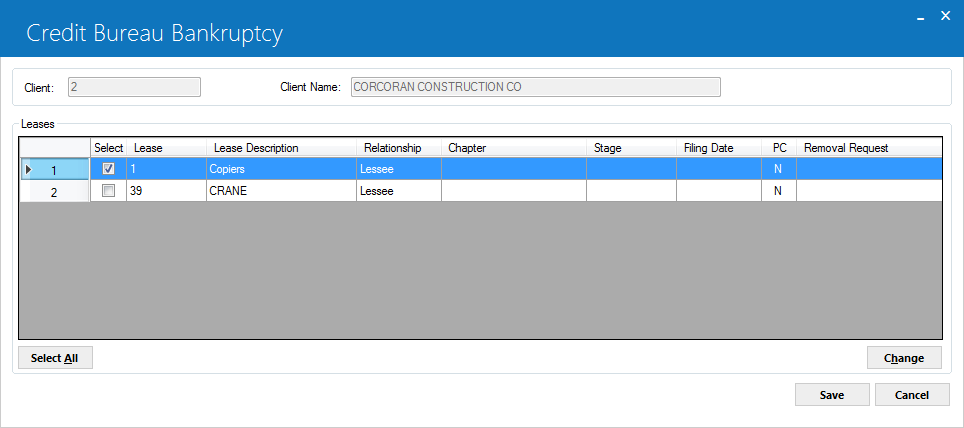
Client ID (display)
- Display
-
The selected client number.
Database equivalent: rcx.client_id_s
Client Name
- Display
-
Short Name for the selected client number.
Database equivalent: rcx.client_s_name_s
Select
- Optional
-
(Grid) Select/check the box indicating which leases are to be updated for the selected client.
Lease
- Display
-
(Grid) The lease number of the associated lease.
Database equivalent: rls.lse_s Database equivalent: rgc.app_lse_s
Lease Description
- Display
-
(Grid) The general description of the associated lease.
Database equivalent: rls.desc_s
Client Type
- Display
-
(Grid) 'L', 'C', or 'G', according to Client type. This is the relationship of the selected client to this lease.
Database equivalent: rgc.client_typ_c
Chapter
- Display
-
(Grid) Bankruptcy chapter assigned to client for associated lease, if any.
Stage
- Display
-
(Grid) Bankruptcy stage assigned to client for associated lease, if any.
Filing Date
- Display
-
(Grid) The bankruptcy filing date, if any.
Database equivalent: rlsb.d_bankruptcy_s Database equivalent: rgc.d_bankruptcy_s
PC
- Display
-
(Grid) 'Y' or 'N' for "Plan confirmed". This indicates whether or not a plan has been confirmed for the bankruptcy.
Database equivalent: rlsb.bkrpt_plan_confirmed_c Database equivalent: rgc.bkrpt_plan_confirmed_c
Removal Request
- Display
-
(Grid) Displays 'REMOVE PREV BNKRPTCY', 'RMV PREV REAFF/ASUMP', or 'REMOVAL REQUEST' if there is a "Report removal request" (CII value Q or S) set on the client for the associated lease.
Unselect All
- Optional
-
(Button) Click to clear/uncheck all boxes under "Select".
Change
- Optional
-
(Button) Click to modify the selected leases. LeasePak will display the update window.
Update
Introductory Notes
Use the following window to update the bankruptcy settings for the selected leases:
Screen and Fields
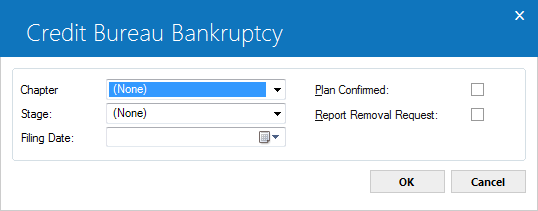
Chapter (update)
- Conditional
-
Intially displays the current chapter setting if the same for all selected leases. Click
 to select bankruptcy Chapter for the client/selected leases. The User can select from:
- CH7 CHAPTER 7
- CH11 CHAPTER 11
- CH12 CHAPTER 12
- CH13 CHAPTER 13
- PRCV PERSONAL RECEIVERSHP
 U0722 Custom Code category: 'BKRPT.CHAP'. The User can modify code descriptions but not add or delete codes. If the user has selected 'PRCV PERSONAL RECEIVERSHP' for "Chapter", the update will ignore any selection for "Stage" and set CII value to 1A (Personal Receivership) for the client/selected leases group.
Stage
- Conditional
-
Initially displays the current stage setting if the same for all selected leases. Click
to select bankruptcy Stage for the client/selected leases. The User can select from:- ASSU ASSUMED
- DISC DISCHARGED
- DISM DISMISSED
- PETI PETITIONED
- WITH WITHDRAWN
U0722 Custom Code category: 'BKRPT.STGE'. The User can modify code descriptions but not add or delete codes. If the user has selected 'PRCV PERSONAL RECEIVERSHP' for "Chapter", the update will ignore any selection for "Stage" and set CII value to 1A (Personal Receivership) for the client/selected leases group.
Filing Date
- Optional
-
Intially displays the current Filing Date if the same for all selected leases. Enter the bankruptcy filing date using a MM/DD/YY or DD/MM/YY format, depending on your Date Format Preference in Windows Region and Language Settings.
Database equivalent: rlsb.d_bankruptcy_s Database equivalent: rgc.d_bankruptcy_s
Plan confirmed
- Optional
-
Intially displays plan confirmation status if the same for all selected leases. Select/check box to indicate that a plan has been confirmed for the bankruptcy. Clear/uncheck the box if a plan has not been confirmed.
Database equivalent: rlsb.bkrpt_plan_confirmed_c Database equivalent: rgc.bkrpt_plan_confirmed_c
Report removal request
- Optional
-
Select/check box to place the appropriate CII removal value on the client/selected leases group. Depending on the existing CII value for each client/lease combination in the group, removal values will be from the following:
- Q REMOVE PREV BNKRPTCY
- S RMV PREV REAFF/ASUMP
 Selecting/checking "Report removal request" takes precedence over any changes to bankruptcy "Chapter" or "Stage". The update will set the appropriate removal code, regardless of changes to "Chapter" or "Stage".
Different warning messages will appear when changing multiple leases with different plan. Click on OK to continue with the updated change.
To save changes, click OK, verify changes on the Leases screen, then click Save. Clicking Cancel from either the update window or the Leases screen will exit the update without saving changes.
© 2026 NETSOL Technologies. All rights reserved.
The information contained in this document is the sole property of NETSOL Technologies, Inc. Use of the information contained herein is restricted. Conditions of use are subject to change without notice. NETSOL Technologies, Inc. assumes no liability for any inaccuracy that may appear in this document nor does it have the obligation to update any of the information contained herein; the contents of this document do not constitute a promise or warranty. The software described in this document is furnished under license and may be used or copied only in accordance with the terms of said license. Unauthorized use, alteration, or reproduction of this document without the written consent of NETSOL Technologies, Inc. is prohibited.
The information contained in this document is the sole property of NETSOL Technologies, Inc. Use of the information contained herein is restricted. Conditions of use are subject to change without notice. NETSOL Technologies, Inc. assumes no liability for any inaccuracy that may appear in this document nor does it have the obligation to update any of the information contained herein; the contents of this document do not constitute a promise or warranty. The software described in this document is furnished under license and may be used or copied only in accordance with the terms of said license. Unauthorized use, alteration, or reproduction of this document without the written consent of NETSOL Technologies, Inc. is prohibited.