LeasePak Client
- Installation
Start here if you are installing LeasePak on your client computer for the first time.
- System Requirements
- Server Requirements
- Procedure Overview
- Client Preparation
- DBMS Client
- MDAC
- LeasePak Setup Program
- Client Software Installation
- Configuration
Start here if you have finished installing or upgrading LeasePak and need to perform additional configuration on your client computer.
- Upgrade and Conversion
Start here if you have a previous installation of LeasePak on your client computer.
Installation
System Requirements
Review the LeasePak Client section of the document System Requirements before beginning the installation process to ensure your client computer meets the minimum requirements for LeasePak .
Server Requirements
Each LeasePak client user requires the following:
- An initial client string translated into server and DBMS server passwords.
- A user account on the server, set up with the corresponding translated password and the LeasePak group.
- A user account on the DBMS server with the corresponding translated password.
- Permission to access at least one environment/database on the LeasePak server.
For more information, refer to LeasePak Users.
Procedure Overview
This is the procedure for installing LeasePak on a client computer where no previous installation of LeasePak exists. If the computer has a previous installation, use the procedure described in the Upgrade and Conversion section of this document.
- Prepare the client computer for installation.
- Install MDAC, if needed.
- Run LeasePak Setup from the CD or network.
- Install the LeasePak client software.
Select the installation appropriate to your needs:
- Configure the client software.
Perform the following required configurations:
Windows 2000, Windows 2000 Terminal Server only: complete the following additional configuration for each user's LeasePak installation on the computer. This procedure provides each user with individual
LEASEPAK.INIandLPCODE.TXTfiles.
Client Preparation
Windows Update
From the Microsoft Windows Update web site, install the latest updates for your version of Windows.
Client/Server Connection
Test the connection between the LeasePak client and server:
- From the Start menu, select Run
- Type
ping hostwhere host is the name or IP address of the LeasePak server, then click Enter.
You should receive a reply from the server similar to the following:
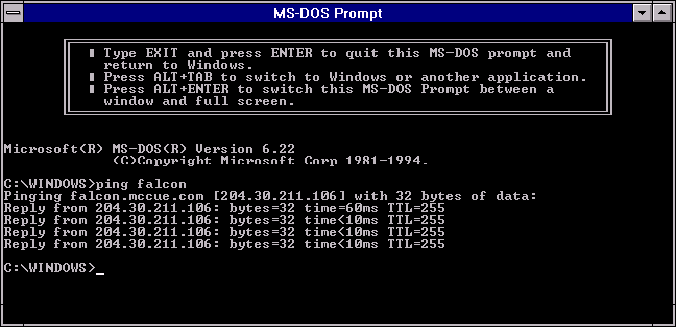
If the window displays "Request timed out," the client was unable to complete the connection to the server. If the window displays "Bad IP address," either the IP address is incorrect, or you need to set either your network or the client computer to resolve the host name properly.
Short Date
Set the Windows Short Date format:
- In the Control Panel, select Regional Options, then the Date tab.
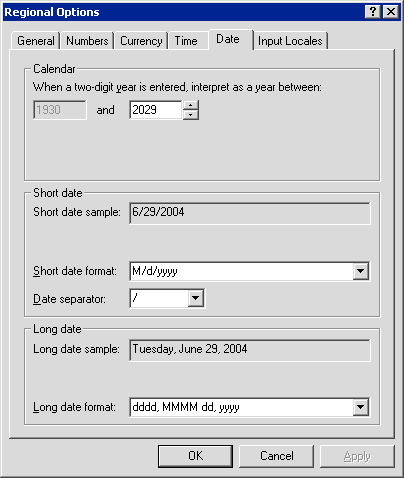
- Set the Short date format to either M/d/yyyy or D/m/yyyy.
This setting must match the User Date Preference set for the user in the LeasePak Security [U0706] update.
DBMS Client
Refer to the appropriate document for installing, upgrading, and/or configuring the DBMS client:
MDAC
Install MDAC (if needed) for the following situations:
- You are running Windows 98 or Windows NT on your client computer, and
you are using applications other than LeasePak that require an ODBC connection; or - You are using EOP Monitor
If you need to install MDAC, contact your MSI representative for information on locating or obtaining the setup programs.
To install MDAC:
- Run mdac_typ.exe. The program will display the End User License Agreement box
check the field Yes, I accept all of the terms of the preceding license agreement and click Next to continue.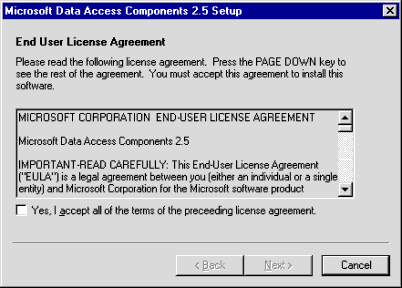
- The program displays the Installing the Software box
click Next to continue.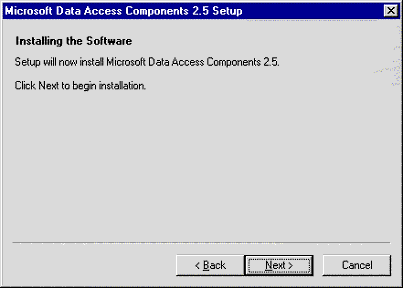
- The program displays the Copying Files box
click Cancel if you need to cancel the installation.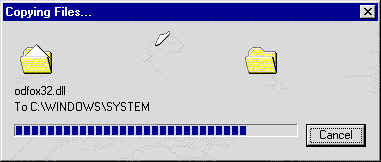
- When the installation is complete, the program displays the Setup is Complete box
click Finish to exit the program.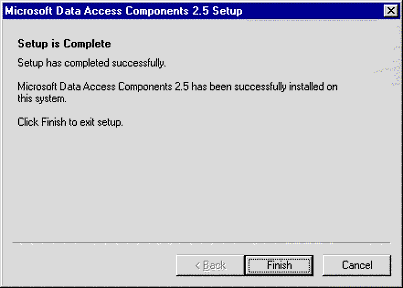
LeasePak Setup from CD or Network
Close all other Windows programs prior to running the setup.
Windows NT, Windows 2000: log on the client computer as Administrator or other user with Administrator privileges. The installer requires Administrator privileges to correctly write to the registry and the systems directory.
The path of setup.exe is:
\lpux\software\lpclient\setup.exe
To install LeasePak directly from the CD or over your local network, either:
- double click
path\lpux\software\lpclient\setup.exein Windows Explorer, where path is the CD-ROM drive or network location; or - select Run from the Windows Start menu, then type
path\lpux\software\lpclient\setup.exe(where path is the CD-ROM drive or network location) and click OK.
The installer displays the following messages:
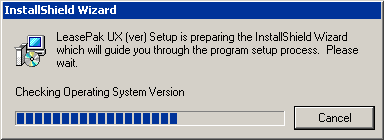
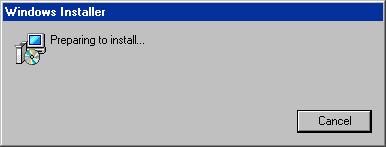
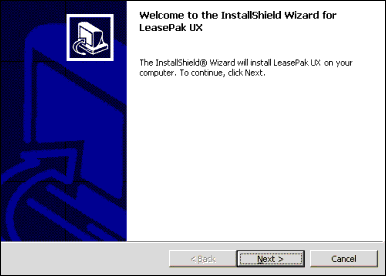
When the following dialog box appears, click Next to begin the installation:
Enter user information then click Next:
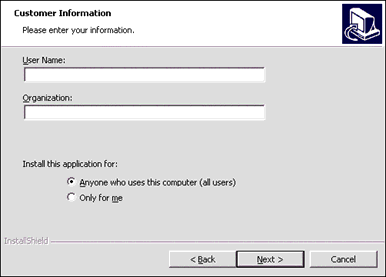
Field Descriptions
- User Name
- Enter a user name for this installation. It does not have to be unique.
- Organization
- Enter the company name for this installation.
- Install this application for
- Windows NT, Windows 2000, Windows XP users only. Select one of the following:
- Anyone who uses this computer (all users). Machine-level installation: any user logging on to the computer will have access to LeasePak.MSI recommends a machine-level installation.
- Only for me (user name). User-level installation: only the user currently logged on to the computer will have access to LeasePak. If more than one user on the computer requires access, you will need a separate installation for each qualified user. Refer to the section User-Level Installation for further configuration requirements of user-level installations.
Accept the default destination folder or change to another destination folder, then click Next.
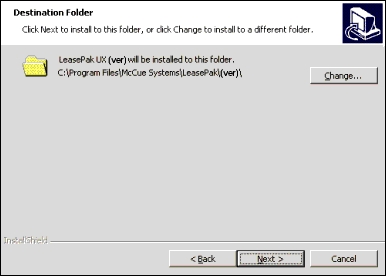
MSI recommends installation to the default folder.
To change the destination folder, click Change. The following dialog box appears:
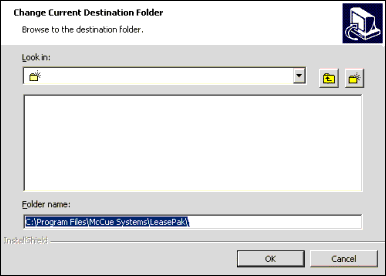
Field Descriptions
- Look in
- Use to browse for the desired destination folder.
- Folder name
- Enter a new path or new folder name. If you have other versions of LeasePak installed, MSI recommends creating a new, version-specific folder (such as ) for this installation.
Click OK to use the specified destination folder. The installer returns to the previous dialog box:

Click Next to continue.
Typical Installation
For custom installation, refer to the section Custom Installation.
From the Setup Type dialog box, select Typical and click Next.
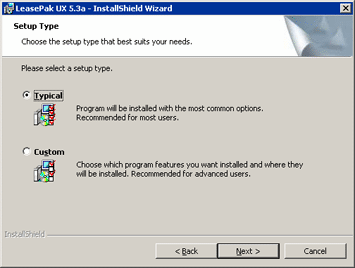
The Typical installation option installs the most common options, including:
- LeasePak UX, the LeasePak client software.
- The installed components can be changed or modified at a later time. Refer to the section LeasePak Client Modification, Repair, and Removal for further instructions. For more information on these options, please contact MSI.
In addition, the Typical option uses the default path and folder for the LeasePak user directory:
Windows 98 c:\my documents\LeasePak\
Windows NT c:\winnt\profiles\user\personal\LeasePak\
Windows 2000 c:\documents and settings\user\my documents\LeasePak\
Windows XP c:\documents and settings\user\my documents\LeasePak\
Files in the LeasePak user directory include:
CMDBUFF.LOG, DBG1.LOG, DBG3.LOG, LEASEPAK.INI, LPCODE.TXT and NEWLABLES.TXT
Windows NT, Windows 2000, Windows XP: Machine-level installations for multi-user computers may require installing the LeasePak user files in a location accessible by all users. Change the location of the LeasePak user directory by using the Custom Installation
Click Install to begin the LeasePak client software installation.
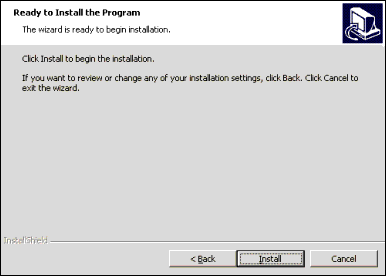
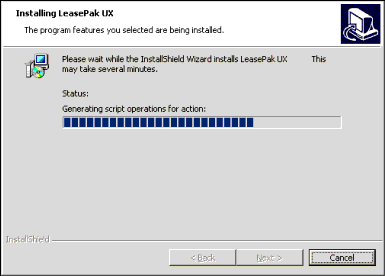
The following dialog box displays information on the progress of the installation. Wait for the installer to finish, or click Cancel at any time to abort the installation.
When the installation is finished, the following dialog box appears. Click Finish to exit the installer.
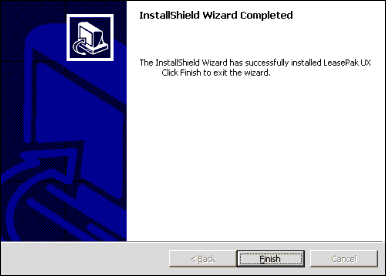
You must restart your computer before using LeasePak.
Custom Installation
For typical installation, refer to the section Typical Installation.
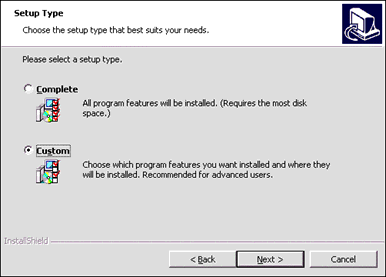
From the Setup Type dialog box, select Custom and click Next.
Do not accept the default LeasePak user directory folder--this is the Administrator user's folder and the actual LeasePak client user, in most cases, will not have access to it. Click Change to switch to another folder.
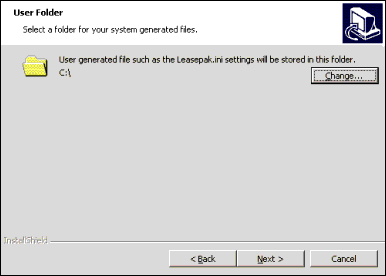
Files in the LeasePak user directory include:
CMDBUFF.LOG, DBG1.LOG, DBG3.LOG, LEASEPAK.INI, LPCODE.TXT and NEWLABLES.TXT
To change the user directory folder, click Change. The following dialog box appears:
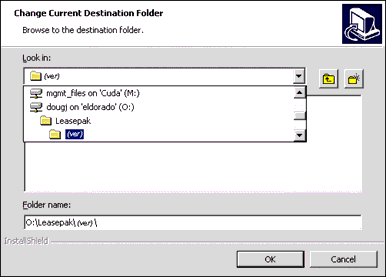
Use this dialog box to select another folder, either locally or on your network.
Field Descriptions
- Look in
- Use to browse for the desired user folder.
- Folder name
- Enter a new path or new folder name. If you have other versions of LeasePak installed, MSI recommends creating a new, version-specific folder (such as ) for this installation.
Windows 98 c:\my documents\Leasepak\
Windows NT c:\winnt\profiles\all users\Leasepak\
Windows 2000 c:\documents and settings\all users\Leasepak\
Windows XP c:\documents and settings\all users\LeasePak\
To use a folder on your network, select a network share previously mounted for the installing user (Administrator).
The drive letter must be available to all users on the client computer. LeasePak will resolve the path
specified and store local preference files in the selected folder. In this example, drive O: must be mapped to a
unique location for each user on the client computer, and for each user the drive must contain the path
O:\Leasepak\. If this is not set up, exit the installer and complete the required
configurations, then restart the installation. Within the Administrator's setup, the installer uses this network share
to establish the registry entry in HKEY_LOCAL_MACHINE. Once the installation is complete, the share may be removed from
the Administrator's setup.
The following is an example of the HKEY_LOCAL_MACHINE registry entry
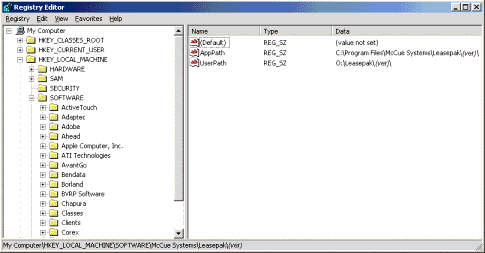
The registry entry is located in the folder My Computer\HKEY_LOCAL_MACHINE\SOFTWARE\McCue Systems\Leasepak\(ver), where (ver) is the specific LeasePak installation.
An additional registry entry is located in My Computer\HKEY_CURRENT_USER\Software\McCue Systems\Leasepak

This contains items such as the toolbar preferences and others that are not stored in the user's
leasepak.ini file.
Click OK to use the specified user folder. The installer displays the Change User Folder dialog box again. Verify the user folder and click OK.
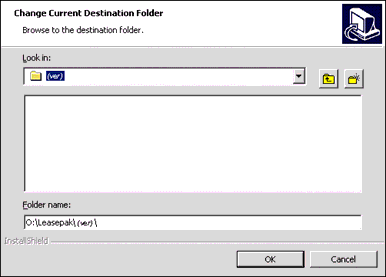
The installer returns to the previous User Folder dialog box (your dialog box will feature the specified path and folder):

Click Next to continue the installation.
Select the program components to install and click Next.
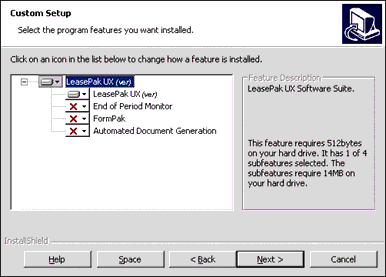
The program components include:
- LeasePak UX, the LeasePak client software.
- End of Period Monitor, a module providing email status notification to the LeasePak End of Period administrator.
- FormPak (obsolete)
- Automated Document Generation, a module that generates XML input for custom forms designed in Microsoft Word.
- Optional components require a registration code to be fully activated. The installed components can be changed or modified at a later time. Refer to the section LeasePak Client Modification, Repair, and Removal for further instructions. For more information on these options, please contact MSI.
After customizing the installation, click Next to continue.

Click Install to begin the LeasePak client software installation.

The following dialog box displays information on the progress of the installation. Wait for the installer to finish, or click Cancel at any time to abort the installation.

When the installation is finished, the following dialog box appears. Click Finish to exit the installer.

You must restart your computer before using LeasePak.
Configuration
In addition to the Configurations described in this section, you can also customize the LeasePak form, field, and menu labels as they appear within the software. For more information on customizations, refer to the document LeasePak Customization.
LeasePak Setup
In the Windows Start menu, select Programs, LeasePak UX
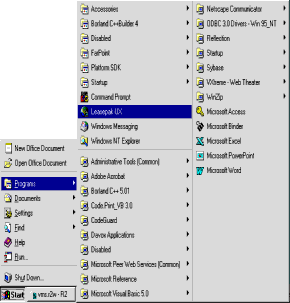
Do not log on. In the LeasePak menu, select Setup.
Setup Tab
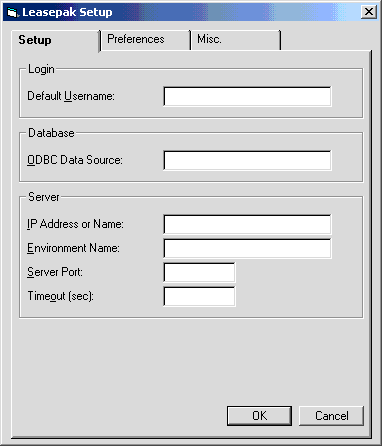
Field Descriptions
- Default Username
- The LeasePak client user's account name.
- ODBC Data Source
- Starting in version 5.1a, LeasePak no longer uses ODBC. Type the LeasePak server name or its IP Address here.
- IP Address or Name
- The IP address or name of the LeasePak server the client user will connect to.
- Environment Name
- The specific LeasePak environment the client user will connect to.
- Server Port
- The TCP port corresponding to the installation of LeasePak the client user will connect to.
- Timeout (sec)
- Time to wait (in seconds) before ending an attempt to connect to the server. Provide sufficient time for remote clients (for example, 300 seconds).
Preferences Tab
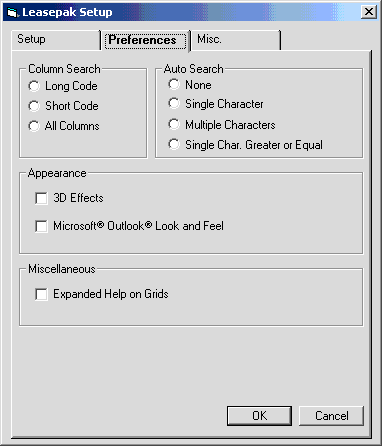
Field Descriptions
- Column Search
- This option allows the user and/or administrator to set the column search capabilities for all drop down combo box menus. Each entry contains a long and short code name and LeasePak will sort and search based on the selection chosen in this field. The LeasePak default value is All Columns.
- Auto Search
- This option allows the user and/or administrator to set the auto search capabilities within LeasePak.
The default value is None.
- None: LeasePak default value. This option will search based on the characters entered.
- Single Character: This option requires a single character to be entered and will display all entries listed within that character.
- Multiple Characters: This option allows multiple characters to be entered and will display all entries listed within those characters.
- Single Character Greater or Equal: This option displays the entries listed for the single character entered plus characters of equal or greater value.
- 3D Effects
- This option allows the user to view all editable fields with a 3D effect or shadow type view. The default value is 2 dimensional.
- Microsoft Outlook Look and Feel
- Duplicates the Microsoft Outlook look and feel, where the tabs of the LeasePak update appear as icons in a
frame on the left side of the screen.
- Expanded Help on Grids
- This option allows the user to select additional expanded help on Native VB grids within LeasePak. With this option on,
multi-column drop down help and client search capabilities may be invoked within certain grids in LeasePak. This option does not
support all grids within LeasePak.
Prior to version v5.0a, native VB grids did not feature client search capabilities, nor did they display multi-column descriptions for drop-down help. Due to the complexity of existing LeasePak code, grids that support the expanded help option may impact normal LeasePak behavior and cause unexpected results.
Miscellaneous Tab
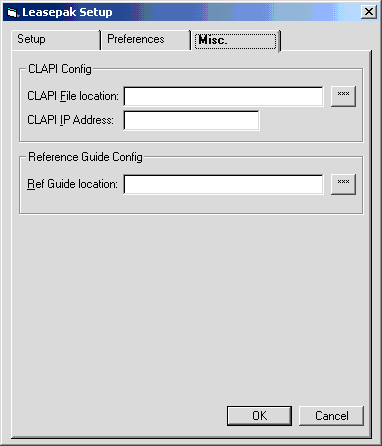
Field Descriptions
- CLAPI File location
- CLAPI IP Address
- These fields configure the location and address of the Client API to be entered for the Davox Interface.
- Ref Guide location
- The path and filename of the LeasePak Reference Guide
index.htmlfile(location)\refguide\index.html
where (location) is the drive letter and path containing the folder
refguide. The client user must have access to this folder in order to use the Help [F1] function within LeasePak.
Printer Configuration
You must use updates within LeasePak to configure printers for the client. You can find the documentation specified in this section in the LeasePak Reference Guide.
- Log on the LeasePak client as
lpadminor other user with full privileges. Refer to the document LeasePak Basics for more information about logging on the client. - Define printers within LeasePak through the
Device and Printer Customizations update of
Custom General [U0712]:
- In the LeasePak menu, select Auxiliary Table Maintenance, Custom General [U0712]
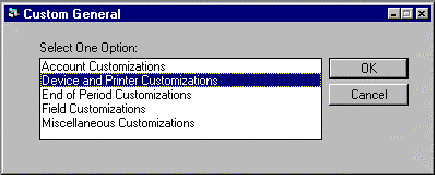
- In the Custom General dialog box, select Device and Printer Customizations and click OK
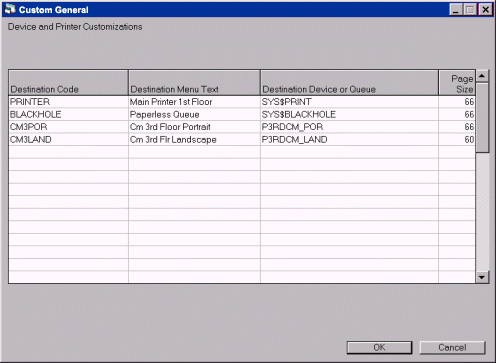
Field Descriptions
- Destination Code
- Custom code name or short name for the printer that will appear when the user is selecting a report destination. Must be unique within the particular LeasePak environment.
- Destination Menu Text
- Custom descriptive text that will appear in when the user is selecting a report destination. Must be unique within the particular LeasePak environment.
- Destination Device or Queue
- LeasePak queue manager print queue name from
start_queues.com. Locate the queue name at the end of the the line:$ init/que/start/form=default/on=LP4SI: sys$print
In
start_queues.com, the queue name is in lowercase, but you must type the queue name in uppercase in Destination Device or Queue. - Page Size
- Number of vertical print lines on a page. These correspond to the
Lengthparameters defined at the top of thestart_queues.comfile. In most cases, portrait printers have 66 lines, while landscape printers have 45. Contact your MSI representative for more information.
- Type the information for all printers and click OK.
- In the LeasePak menu, select Auxiliary Table Maintenance, Custom General [U0712]
- Configure the default report destinations for
lpadminwithin LeasePak through Report Profile [F4]:In most cases, users have access to Report Profile [F4] and can set or change their own default report destinations. The document LeasePak Basics describes the use of Report Profile [F4].
- In the LeasePak menu, select Options, Report Profile [F4]
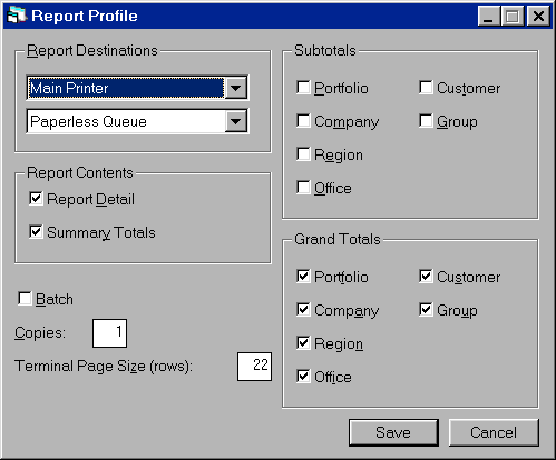
Field Descriptions
- Report Destinations
- Select 2 default destinations for your reports. One of these is usually the Paperless Queue or similar non-printing destination.
- Report Contents
- Select whether reports, by default, will contain detail information only, summaries and totals only, or both.
- Batch
- Select this if you want your reports to run in batch mode. Running in batch mode delays printing of the reports until you exit the reports menu.
- Copies
- Type the number of copies to print for each report. In most cases this is 1.
- Terminal Page Size (rows)
- Determines the maximum number of rows to display within a single report window. Leave this set at its default value, or contact your MSI representative for more information.
- Subtotals
- Select which accounting units will group and break for subtotals.
- Grand Totals
- Select which accounting units will contain grand totals.
- When you've finished configuring your Report Profile, click Save.
- In the LeasePak menu, select Options, Report Profile [F4]
You can change the report profiles for other users through the LeasePak Security [U0706] update. Refer to the Reports section of the document Security [U0706] for information.
Windows 2000 Only: User-Level Installation
Windows 2000, Windows 2000 Terminal Server: after installing LeasePak, you will need to complete
the following procedure for each user's LeasePak installation on the computer. This procedure provides each user with individual
LEASEPAK.INI and LPCODE.TXT files.
- Logon as the first LeasePak user.
- In the user's My Documents folder, create a new LeasePak version folder:
- c:\Documents and Settings\user\My Documents\Leasepak\
- Where user is the current account user name.
- Using Windows Notepad or other text editor, create a registry text file called
"lp_ini_path.reg"(include quotation marks) on the Windows Desktop. - Insert the following four lines into the file
"lp_ini_path.reg"and save:
- Windows Registry Editor Version 5.00
- [HKEY_CURRENT_USER\Software\McCue Systems\Leasepak\]
- "UserPath"="C:\\Documents and Settings\\user\\My Documents\\Leasepak\\\\"
- Where user is the current account user name.
- The second line must be blank. Include the quotation marks on the fourth line.
- Double-click the file
"lp_ini_path.reg"to load it into the Windows registry. Click OK and other confirmation buttons when prompted.
Repeat these steps for each user's LeasePak installation on the computer.
Software Modification, Repair, and Removal
The installer allows the user to Modify, Repair or Remove LeasePak and/or the additional components included in the set up.
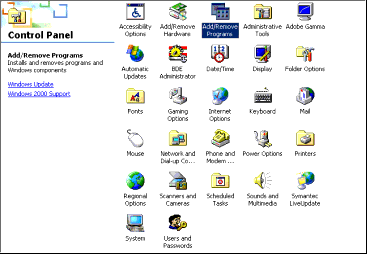
From the Control Panel, select the Add/Remove Software. The following screen will appear: Select LeasePak from the list of installed programs.
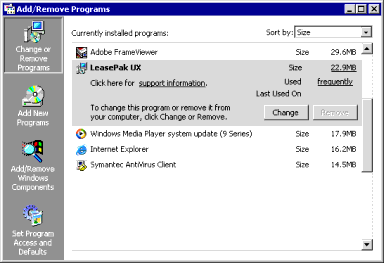
Click the Change button. Select the Change option. The installer will start and assist in the required modifications.


Select Next.

Modify/Repair/Remove dialog box.
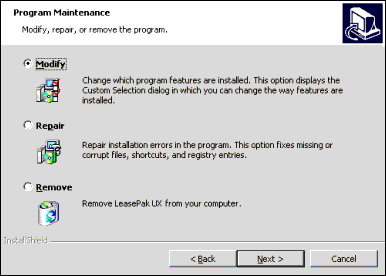
Select the Program Maintenance option desired. Click Next.
- Modify allows the user to add features that have not been installed.
- Repair allows the user to correct installation errors that may have been encountered.
- Remove allows the user to remove LeasePak from the hard drive.
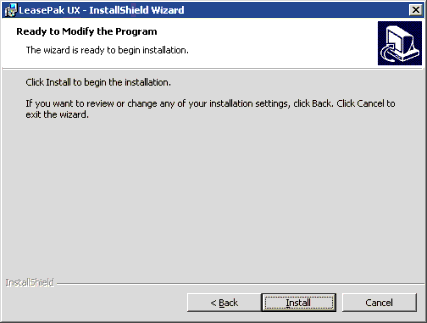
This screen is displayed when the Modify maintenance option is selected. This option is used to add and/or remove program features via the Custom Setup installation option. Select the desired program to add and/or remove.

Copy down custom install components information.

Click Install.
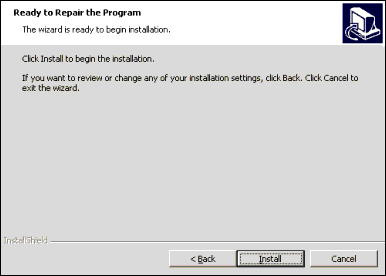
This screen is displayed when the Repair maintenance option is selected. This option is used to repair installation errors in the program. This option repairs missing, corrupt files, shortcuts and registry entries.
Click Install.
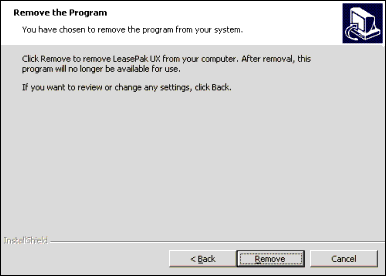
This screen is displayed when the Remove maintenance option is selected. This option completely removes LeasePak from the users computer.
Click Remove to continue.
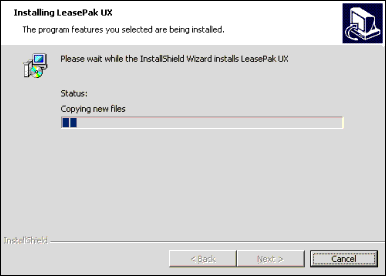
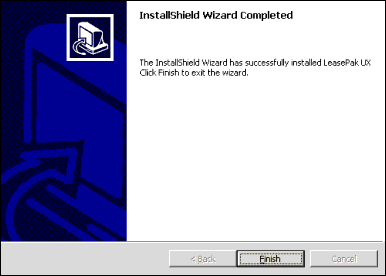
Restart machine.
If the Modify or Remove option was selected, the screen displays the following message: "The InstallShield Wizard has successfully installed LeasePak (version number). Click Finish to exit the wizard." If the Remove option was selected, the screen displays the following message: "The InstallShield Wizard has successfully uninstalled LeasePak. Click Finish to exit the wizard."
Upgrade and Conversion
System Requirements
Review the LeasePak Client section of the document System Requirements before beginning the upgrade process to ensure your client computer meets the minimum requirements for LeasePak .
Server Requirements
Each LeasePak client user requires the following:
- An initial client string translated into server and DBMS server passwords.
- A user account on the server, set up with the corresponding translated password and the LeasePak group.
- A user account on the DBMS server with the corresponding translated password.
- Permission to access at least one environment/database on the LeasePak server.
For more information, refer to LeasePak Users.
Procedure Overview
This is the procedure for installing LeasePak on a client computer where a previous installation of LeasePak exists.
- Remove any previous installations of LeasePak from the client computer.
Unless the user requires more than one version of LeasePak installed, MSI recommends removing all earlier installations of LeasePak prior to installing version General Availability (GA). If the user has a version of Release Candidate (beta) installed, it must be removed prior to installing GA. Use Add/Remove Programs from the Windows Control Panel to remove earlier installations of LeasePak.
 Removing earlier installations of LeasePak
may also remove ODBC driver installations. If you are retaining an existing version of LeasePak (5.0a or earlier), or require ODBC for
other applications, verify that the necessary ODBC drivers are still installed after removing LeasePak.
If drivers are missing, reinstall MDAC 2.5 and the appropriate database client (Oracle or Sybase), then reconfigure the ODBC driver
installations.
 - Prepare the client computer for installation.
- Install the LeasePak client software.
Select the installation appropriate to your needs:
- Configure the client software.
Perform the following required configurations:
Windows 2000, Windows 2000 Terminal Server only: complete the following additional configuration for each user's LeasePak installation on the computer. This procedure provides each user with individual
LEASEPAK.INIandLPCODE.TXTfiles.
LeasePak Sanitizer
Current LeasePak Version 4.2a or Older Only
Close all other Windows programs prior to running the this program.
Windows NT, Windows 2000: log on the client computer as Administrator or other user with Administrator privileges. The installer requires Administrator privileges to correctly write to the registry and the systems directory.
- Locate the LeasePak Sanitizer program on the LeasePak setup CD or directory on the
network.
The path of
leasepaksanitizer.exeis:\lpux\software\leasepaksanitizer
- Run
leasepaksanitizer.exe.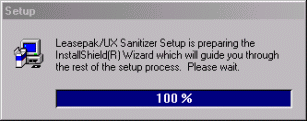
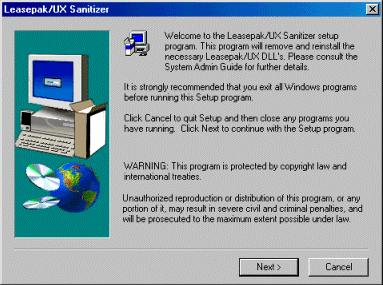
The installer displays the Welcome dialog box. Click Next.
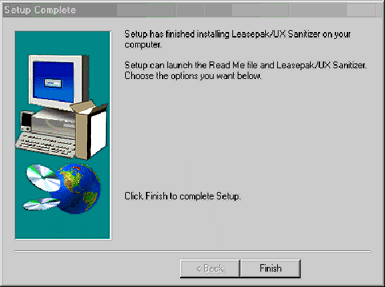
Once the installation is complete, the installer displays the Setup Complete dialog box. Click Finish.
- Reboot the client computer to complete the installation process.
Maintenance and Troubleshooting
leasepak.ini
The leasepak.ini file, located in the client LeasePak directory, contains the user settings.
It also has sections that the user or administrator can use to assist MSI in troubleshooting.
[login]
DefaultUsername=lpadmin

[database]
DataSource=server1_sybase

[server]
TcpIpAddress=server1
Environment=production
Port=
MaxConnections=10
Timeout=60

[credit dial-up]
Port=6000
Subscriber_Code=

[window]
IsMaximized=1
Xpos=0
Ypos=0
Width=9390
Height=7770

[logicals]
leasepak_core=1            ;normally LeasePak dumps 0-length
leasepak_cmd_buffer_log=1  ;transactions between lpadriver.exe and Sybase

[debug]
logfile=1                  ;transactions between client and lpadriver.exe
cmdbufferlog=1             ;transactions between client and Sybase
LeasePak automatically dumps a core file for many errors encountered during End of Period processing.
For End of Period troubleshooting, you do not need to set the leasepak_core logical.
About LeasePak
The About LeasePak dialog box in the LeasePak client contains information pertaining to the current environment,
LeasePak license, leasepak.ini settings, and other user preferences.
In the LeasePak menu, select Help, then About
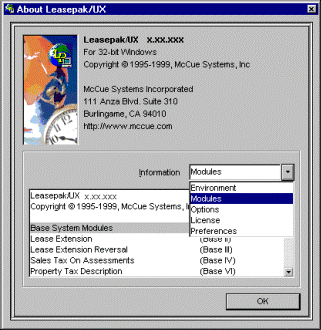
In the field Information, select the type of information you wish to view:
- Environment
- Includes the user name, server name, environment, data source, database, installation path, and user path.
- Modules
- Displays a list of all modules available under the current license.
- Options
- Displays
leasepak.inisettings for the user. - License
- Includes the seat limit, total number of user licenses, and total number of report licenses.
- Preferences
- Displays additional preferences configured for the user.
LeasePak Documentation Suite
© by McCue Systems Incorporated. All rights reserved. The information
contained in this document is the property of McCue Systems, Inc. Use of the
information contained herein is restricted. Conditions of use are subject
to change without notice. McCue Systems, Inc. assumes no liability for any
inaccuracy that may appear in this document; the contents of this document
do not constitute a promise or warranty. The software described in this document
is furnished under license and may be used or copied only in accordance with
the terms of said license. Unauthorized use, alteration, or reproduction of
this document without the written consent of McCue Systems, Inc. is prohibited.

